Hot water suddenly disappearing is a problem every homeowner dreads. You might expect the culprit to be a failing tank or busted pipes. But the truth is, an estimated 60 percent of water heater malfunctions start with a simple power supply or thermostat issue. Solving your cold shower nightmare is often far easier than it seems.
Table of Contents
- Step 1: Check The Power Supply And Connections
- Step 2: Inspect The Thermostat Settings
- Step 3: Examine The Heating Element Functionality
- Step 4: Assess The Water Supply And Pressure
- Step 5: Verify The Tank And Pipe Integrity
- Step 6: Perform A Final Test And Service Confirmation
Quick Summary
| Key Point | Explanation |
|---|---|
| 1. Check the circuit breaker first | Ensure the water heater’s circuit breaker is reset if hot water stops. A tripped breaker can interrupt power supply. |
| 2. Verify thermostat settings are correct | Set the thermostat between 120-140 degrees Fahrenheit to maintain optimal temperature. Adjust if necessary to ensure proper operation. |
| 3. Inspect heating elements for damage | Visually check for corrosion and test electrical continuity with a multimeter. Faulty elements may require replacement. |
| 4. Ensure water supply valve is open | Confirm that the main water supply valve is fully open to prevent pressure issues. A closed valve restricts hot water access. |
| 5. Final test for consistent performance | After troubleshooting, test by checking water temperature from multiple hot water faucets. Listen for unusual sounds during heating. |
![]()
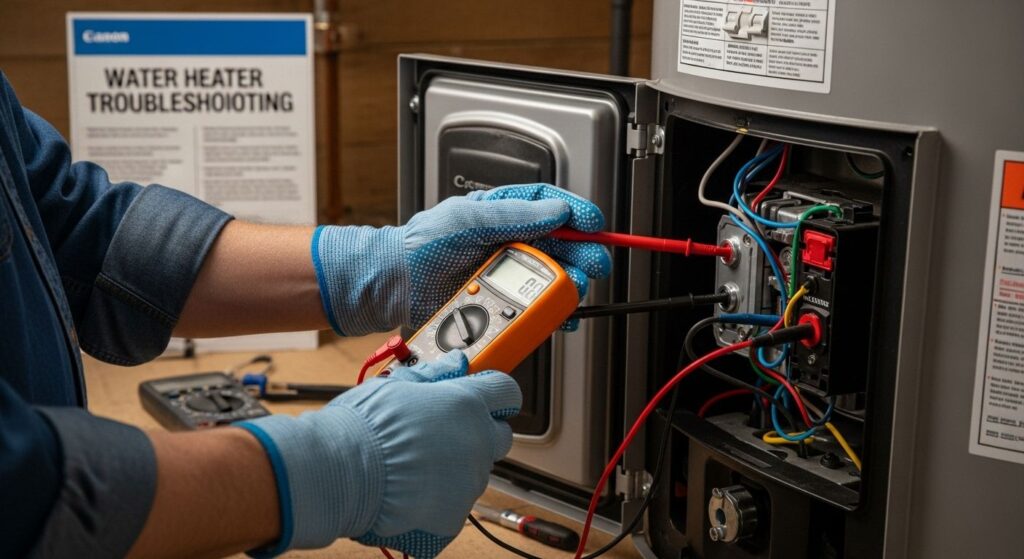
Step 1: Check the Power Supply and Connections
Water heater troubleshooting starts with understanding your electrical system’s connection to the appliance. When your hot water suddenly stops flowing, the power supply could be the primary culprit preventing proper functionality.
Begin by examining your home’s electrical panel. Locate the circuit breaker specifically dedicated to your water heater. Carefully inspect whether the breaker has tripped, which appears as a switch positioned between the fully “on” and “off” positions. A tripped breaker indicates an electrical interruption that might be preventing your water heater from operating correctly.
Carefully reset the breaker by first switching it completely to the “off” position, then firmly moving it back to the “on” position. Listen for a definitive click that confirms the reset. According to research from the University of Hawai’i Maui College, verifying circuit breaker status is a critical first step in diagnosing water heater problems.
If resetting the breaker doesn’t resolve the issue, you’ll want to conduct a more thorough investigation. Using a multimeter can help confirm whether electricity is reaching the water heater. Ensure the device is unplugged before testing, and follow safety protocols carefully. Look for signs of loose connections, frayed wires, or visible damage to the electrical components near your water heater.
Key verification steps to confirm power supply integrity include:
- Checking that the circuit breaker is fully engaged
- Confirming no visible wire damage
- Verifying no signs of electrical scorching or burning around connections
Should these initial diagnostic steps not reveal the problem, or if you feel uncertain about electrical testing, it’s crucial to contact a professional plumber. Electrical systems can be complex and potentially dangerous if mishandled. Professional technicians can safely diagnose and resolve underlying electrical issues preventing your water heater from functioning correctly.
Remember, water heater troubleshooting requires patience and careful observation. By methodically checking your power supply and connections, you’re taking the first important step toward restoring your home’s hot water system.
To help you prepare for troubleshooting your water heater, here is a quick table of essential tools and their purposes:
| Tool/Material | Purpose | Safety Notes |
|---|---|---|
| Multimeter | Test electrical continuity, voltage | Use with power OFF, follow protocol |
| Flathead screwdriver | Remove access or thermostat panels | N/A |
| Non-contact voltage tester | Check for live current before touching components | Confirm no electrical current present |
| Protective rubber gloves | Prevent electrical shock and injuries | Always wear during electrical work |
| Paper towel/tissue | Detect moisture or leaks at pipe connections | N/A |
| Flashlight | Illuminate dark or hidden areas for inspection | N/A |
| Water pressure gauge | Measure home water pressure (PSI) | Use on spigot or drain valve |
Step 2: Inspect the Thermostat Settings
After confirming your water heater’s power supply, the next critical step in water heater troubleshooting involves carefully examining the thermostat settings. Thermostat configuration plays a pivotal role in determining water temperature and overall system performance.
Electric water heaters typically feature two thermostats located behind an access panel on the unit’s side. These controls regulate the upper and lower heating elements, which work together to maintain consistent water temperature. Begin by removing the protective metal cover carefully, using a flathead screwdriver. Keep the screws nearby to ensure you can replace the cover securely after your inspection.
Locate the temperature adjustment dial, which usually ranges between 120 and 140 degrees Fahrenheit. According to the U.S. Department of Energy, 120 degrees represents an optimal setting that balances energy efficiency and comfortable water temperature. Check that the thermostat is set within this recommended range. If the dial appears misaligned or stuck, gently adjust it to the standard 120-degree mark.
Pay close attention to any signs of corrosion, rust, or visible damage around the thermostat connections. These indicators might suggest underlying issues affecting your water heater’s performance. Use a non-contact voltage tester to ensure no electrical current is present before touching any components. Wear protective rubber gloves as an additional safety precaution during your inspection.
Important verification steps include:
- Confirming thermostat is set between 120-140 degrees
- Checking for visible damage or corrosion
- Ensuring secure and clean electrical connections
If you notice any unusual signs such as burned contacts, discoloration, or loose wiring, this might indicate a more serious electrical problem. In such cases, professional intervention becomes necessary. Some water heater issues can be complex and potentially dangerous if not addressed by a trained technician.
Remember that consistent thermostat settings are crucial for maintaining reliable hot water supply and preventing unnecessary energy consumption. By methodically checking and adjusting your thermostat, you’re taking proactive steps toward resolving potential water heater performance challenges.
Step 3: Examine the Heating Element Functionality
Heating element problems are a common culprit behind water heater performance issues. Electric water heaters rely on these crucial components to transform electrical energy into heat, making their proper functioning essential for consistent hot water delivery.
Before beginning your inspection, ensure complete electrical safety by switching off the circuit breaker dedicated to your water heater. This precautionary step prevents potential electrical shock and protects you during the diagnostic process. Allow the water heater to cool down for approximately 30 minutes to reduce the risk of burns from residual heat.
Access the heating elements by removing the metal access panel on your water heater. You’ll typically find two elements – one near the top and another closer to the bottom of the tank. Look for visible signs of damage such as corrosion, discoloration, or mineral buildup. These indicators can suggest why your heating elements might not be performing optimally.
According to research from the University of Hawai’i’s Building Maintenance guide, testing heating element functionality requires a multimeter to check electrical continuity. To perform this test, disconnect the electrical wires from the element and set your multimeter to the resistance or ohms setting. Touch the multimeter probes to the element’s terminal screws. A functional heating element will display a specific resistance reading, while a faulty element will show an infinite reading.
Key diagnostic steps include:
- Turning off electrical power to the water heater
- Visually inspecting elements for physical damage
- Using a multimeter to test electrical continuity
- Checking for consistent resistance readings
Replacement becomes necessary if the heating element fails the continuity test or shows significant physical deterioration. While some homeowners feel comfortable performing this replacement, others might prefer professional assistance to ensure proper installation and safety.
Remember that heating element issues can manifest through various symptoms. Inconsistent water temperature, complete lack of hot water, or unusual rumbling sounds might all indicate potential element problems. By methodically examining and testing these components, you’re taking a proactive approach to resolving your water heater’s performance challenges.
Step 4: Assess the Water Supply and Pressure
Water supply and pressure problems can significantly impact your water heater’s performance, leading to frustrating hot water inconsistencies. Understanding how water enters and flows through your system is crucial for effective troubleshooting.
Start by locating the main water supply valve near your water heater. This valve controls water flow into the entire system and should be fully open for optimal performance. Gently turn the valve counterclockwise to ensure it’s completely operational. A partially closed valve can restrict water flow, causing reduced hot water pressure and temperature fluctuations.
Next, examine the water inlet and outlet connections on your water heater. Look for any visible signs of leakage, corrosion, or mineral buildup around these connection points. These issues can impede water flow and reduce overall system efficiency. If you notice any white or greenish crusty deposits, this might indicate hard water mineral accumulation that could be restricting water movement.
Learn more about managing home water pressure and its impact on your plumbing system. According to the U.S. Department of Energy, maintaining proper water pressure is essential for consistent hot water delivery.
Important pressure assessment steps include:
- Checking that the main water supply valve is fully open
- Inspecting inlet and outlet connections for leaks
- Verifying no visible mineral buildup or corrosion
- Listening for unusual sounds during water flow
A standard home water system should maintain pressure between 40 and 60 pounds per square inch (PSI). To accurately measure this, consider using a water pressure gauge that attaches to an outdoor spigot or the water heater’s drain valve. If pressure falls significantly below or above this range, it might indicate underlying plumbing issues that require professional assessment.
Pay attention to additional symptoms like sputtering faucets, inconsistent water temperature, or reduced water flow. These can be telltale signs of water pressure problems beyond your water heater. By methodically examining your water supply and pressure, you’re taking a comprehensive approach to diagnosing and resolving potential hot water system challenges.
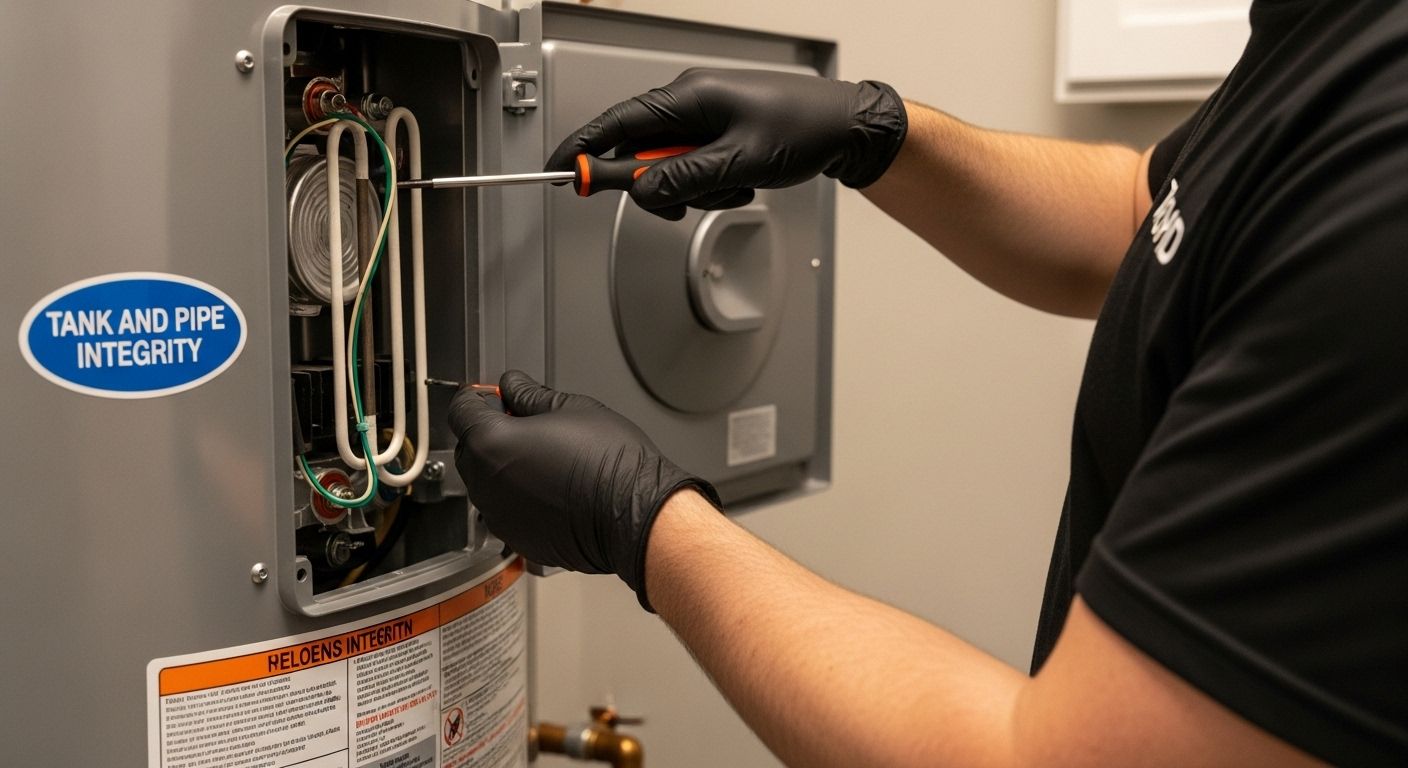
Step 5: Verify the Tank and Pipe Integrity
Verifying the structural integrity of your water heater tank and connected pipes is a critical step in comprehensive water heater troubleshooting. Water leaks and structural damage can compromise your entire hot water system, potentially leading to significant property damage and expensive repairs.
Begin your inspection by carefully examining the water heater tank’s exterior. Look for any signs of corrosion, rust, or moisture accumulation around the tank’s base and connections. Pay special attention to the bottom of the tank, where sediment buildup and potential leakage are most likely to occur. A small flashlight can help you detect subtle signs of deterioration that might be difficult to spot with the naked eye.
According to research from the University of Hawai’i Maui College, systematic tank and pipe inspection involves checking both visible and concealed components. Trace the pipes leading to and from your water heater, examining every connection point for potential leaks. Use a dry paper towel or tissue to test for moisture around pipe joints and connections. Even minor dampness can indicate developing issues that require immediate attention.
Check out our comprehensive guide on preventing pipe damage to help maintain your system’s long-term health. Understanding potential warning signs can save you from costly future repairs.
Critical inspection points include:
- Checking tank exterior for rust or corrosion
- Examining pipe connections for moisture or leaks
- Inspecting tank base for signs of water accumulation
- Listening for unusual sounds indicating potential structural stress
White, crusty deposits around pipe connections might signal mineral buildup, which can accelerate corrosion and reduce your water heater’s efficiency. If you notice significant mineral accumulation, consider consulting a professional plumber for a thorough assessment and potential descaling treatment.
Remember that water heater tanks typically have a lifespan of 8-12 years. If your tank is approaching or exceeding this age range and shows signs of significant wear, replacement might be more cost-effective than extensive repairs. By methodically verifying your tank and pipe integrity, you’re taking a proactive approach to maintaining your home’s hot water system.
This checklist table summarizes the key verification steps for each major troubleshooting stage to track your progress and ensure a systematic approach:
| Step | Key Verification Actions |
|---|---|
| Power Supply & Connections | Breaker reset, no wire damage, no scorching |
| Thermostat Settings | Set to 120-140°F, no corrosion, secure connections |
| Heating Element Functionality | Power off, visual check, multimeter continuity/resistance |
| Water Supply & Pressure | Main valve open, no leaks, no buildup, standard 40-60 PSI |
| Tank & Pipe Integrity | Inspect tank for rust/leaks, check joints with tissue, look for buildup |
| Final Test & Service Confirmation | Hot water at multiple faucets, no odd sounds, no leaks, clear water |
Step 6: Perform a Final Test and Service Confirmation
The final step in water heater troubleshooting involves systematically testing your system to confirm that all previous diagnostic efforts have successfully resolved the initial problems. This comprehensive verification process ensures your water heater operates at peak performance.
Begin by carefully restoring power to your water heater. Switch the circuit breaker back to its original position and wait approximately 30-45 minutes. During this time, the system will begin heating water and stabilizing its internal temperature. Listen carefully for any unusual sounds such as popping, crackling, or persistent humming, which might indicate unresolved mechanical issues.
According to research from the University of Hawai’i Maui College, a thorough final test involves checking multiple performance indicators. Open several hot water faucets throughout your home to assess water temperature consistency. Start with the faucet closest to the water heater, then progressively test those further away. You’re looking for steady, uniform hot water that reaches the temperature you’ve set on the thermostat.
Learn more about maintaining optimal water heater performance and preventing future issues. Consistent maintenance can significantly extend your system’s operational lifespan.
Key verification steps include:
- Confirming steady hot water temperature across multiple faucets
- Checking for consistent water pressure
- Verifying no unusual sounds or vibrations
- Ensuring no visible leaks around connections
Pay special attention to water color and odor during this test. Clear, odorless water indicates a healthy system. Any discoloration or unusual smell might suggest internal tank deterioration or bacterial growth, potentially requiring professional intervention.
If you’ve methodically followed the previous troubleshooting steps and still experience persistent issues, it’s time to consult a professional plumber. Some water heater problems require specialized diagnostic equipment and expert knowledge. Remember that while DIY troubleshooting can resolve many common issues, complex mechanical failures often necessitate professional assessment to prevent further damage and ensure your home’s hot water system operates safely and efficiently.
Restore Hot Water Comfort With Ottawa’s Most Trusted Plumbers
Struggling with a lack of hot water or facing sudden interruptions in your daily routine? After reading our detailed guide on water heater troubleshooting, you know how overwhelming it can be to check power supplies, thermostats, and tank integrity without expert help. These steps, while helpful for minor issues, may not resolve deeper mechanical or electrical problems and can even leave you worried about safety and lasting damage.
Explore our professional plumbing solutions designed specifically for homes and businesses in Ottawa that need fast, reliable water heater repairs.

Let Delta Plumbers restore your comfort today. With 24/7 support, same-day service, and experienced technicians, we can quickly diagnose and fix your water heater so you never have to go without hot water. Experience peace of mind with our flat-rate pricing and one-year warranty. If your troubleshooting steps have not solved the problem, do not put your property or safety at risk. Contact Delta Plumbers Ottawa now for immediate help and discover why so many Ottawa residents trust us to keep their hot water flowing.
Frequently Asked Questions
What should I check first if my water heater isn’t working?
Start by checking the power supply and connections. Inspect the circuit breaker dedicated to your water heater to see if it has tripped. Reset it if necessary and ensure all wires are connected securely.
How do I adjust the thermostat on my electric water heater?
Locate the thermostat behind the access panel of your water heater and set it to the recommended range of 120 to 140 degrees Fahrenheit. Use a flathead screwdriver to adjust the dial, ensuring it’s not misaligned or stuck.
How can I test if my water heater’s heating elements are functioning properly?
To test the heating elements, switch off the circuit breaker to the water heater, wait for it to cool, and then use a multimeter to check for electrical continuity. A functional heating element should display resistance, while a faulty one will show an infinite reading.
What should I do if I’m experiencing low water pressure in my hot water system?
Check the main water supply valve to ensure it’s fully open and inspect connections for any leaks or mineral buildup. If pressure is significantly below 40-60 PSI, consider using a water pressure gauge and consult a professional if needed.