Pipes can spring a leak without warning and the consequences escalate fast. Hidden leaks can drive up your water bill by as much as 10 percent every month. Most people assume the hardest part is the actual repair but the real challenge is pinpointing the leak before your home suffers major damage. Knowing where to look first just might save you thousands in emergency repairs.
Table of Contents
- Step 1: Identify The Source Of The Leak
- Step 2: Gather Necessary Tools And Materials
- Step 3: Turn Off The Water Supply
- Step 4: Repair The Leaking Pipe
- Step 5: Test The Repair
- Step 6: Restore The Water Supply
Quick Summary
| Key Point | Explanation |
|---|---|
| 1. Identify the leak source quickly | Inspect for moisture signs like water stains, discoloration, or soft spots to locate hidden leaks efficiently. |
| 2. Gather essential tools beforehand | Assemble adjustable wrenches, plumber’s tape, and waterproof gloves to facilitate a smooth repair process. |
| 3. Turn off the water supply first | Locate your main shutoff valve to prevent further water damage and create a controlled workspace for repairs. |
| 4. Test the repair thoroughly | Gradually restore water flow while observing the repaired section for any signs of leakage or issues. |
| 5. Seek professional help if needed | If you’re unsure about the repair or if complications arise, consult a plumber to avoid costly water damage. |
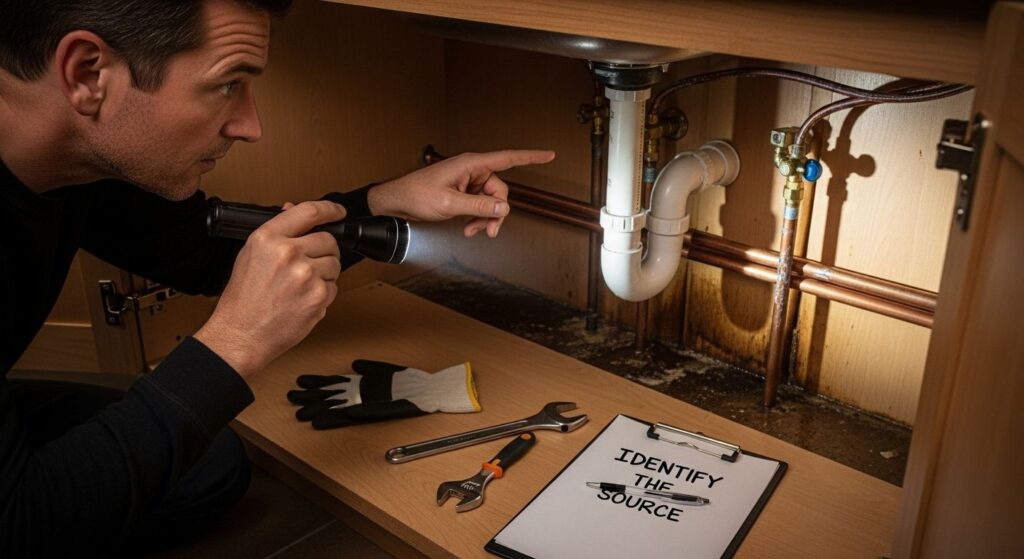
Step 1: Identify the Source of the Leak
Detecting a leaking pipe requires careful observation and systematic investigation. Before grabbing tools or attempting repairs, understanding precisely where and how water is escaping becomes crucial. Water damage can spread rapidly, causing structural problems and potential mould growth, so identifying the leak’s source quickly is your first critical step.
Begin by visually inspecting areas around pipes, checking for telltale signs of moisture. Look for water stains on walls, ceilings, or floors, which often indicate hidden leaks. Discoloration, warping, or soft spots might signal long-term water damage. Pay special attention to areas under sinks, near toilets, around water heaters, and along basement walls where pipes are frequently located.
To pinpoint the exact leak location, perform a systematic water meter test. Turn off all water sources in your home, including appliances and faucets. Locate your water meter and observe its movement. If the meter continues registering water usage while everything is shut off, you likely have an active leak somewhere in your plumbing system. Learn more about detecting hidden plumbing issues to help narrow down potential problem areas.
Some leaks are more challenging to detect and might require additional investigation. Listen for unusual sounds like dripping, hissing, or continuous running water when no fixtures are in use. Water pressure changes or unexpected increases in your water bill can also indicate hidden leaks. For pipes inside walls or underground, you might need specialized equipment like thermal imaging cameras or acoustic sensors to accurately locate the source.
Once you’ve identified the leak’s potential location, carefully examine the pipe for visible signs of damage. Look for corrosion, cracks, loose connections, or areas with mineral buildup. Small pinhole leaks can be particularly tricky, often requiring close inspection. Remember that not all leaks are immediately apparent, and some might only become visible after thorough investigation.
If you cannot confidently determine the leak’s source or if the problem seems complex, do not hesitate to contact professional plumbers. Attempting complex repairs without proper knowledge can potentially cause more significant damage to your plumbing system.
Step 2: Gather Necessary Tools and Materials
Preparing the right tools and materials before addressing a leaking pipe can make the difference between a successful repair and a potential plumbing disaster. Proper preparation saves time, reduces frustration, and minimizes the risk of additional damage to your plumbing system. Before starting your repair, take a moment to assemble everything you will need for a smooth and efficient fix.
Your basic toolkit should include several essential items. Adjustable pipe wrenches are crucial for gripping and turning pipes safely, while plumber’s tape helps create watertight seals at pipe connections. Gather a variety of screwdrivers, both flathead and Phillips, which will help you disassemble pipe fittings and fixtures. Needle-nose pliers can assist with smaller components, and a high-quality pipe cutter becomes invaluable for precise pipe modifications.
Explore our comprehensive guide on pipe repair techniques to understand the nuanced approaches for different pipe materials. Depending on your specific leak, you might need additional materials like pipe replacement sections, soldering equipment for copper pipes, or specialized repair clamps. Waterproof work gloves and safety glasses are essential protective gear that should never be overlooked.
Before beginning the repair, ensure you have appropriate replacement materials matching your existing pipe system. This means knowing whether you have copper, PVC, or galvanized steel pipes. Take measurements of the damaged section and purchase compatible replacement parts. Keep a bucket, towels, and rags nearby to manage any water drainage and clean up potential spills during the repair process.
Below is a summary table of essential tools and materials needed for repairing a leaking pipe, including their primary purpose. Refer to this checklist before starting your repair to ensure you have everything you need.
| Tool/Material | Purpose |
|---|---|
| Adjustable pipe wrench | Grip and turn pipes and fittings |
| Plumber’s tape | Ensure watertight seals at pipe connections |
| Screwdrivers | Disassemble pipe fittings and fixtures |
| Needle-nose pliers | Manipulate small pipe components |
| Pipe cutter | Cut pipes cleanly and precisely |
| Waterproof gloves | Protect hands during repair |
| Safety glasses | Shield eyes from debris and splashes |
| Epoxy putty/sealant | Temporarily seal small leaks and cracks |
| Replacement parts | Replace damaged pipe sections with matching materials |
| Bucket/towels/rags | Manage water drainage and clean-up |
Additionally, purchase plumbing-specific sealants appropriate for your pipe type. Epoxy putty works well for temporary fixes, while silicone-based sealants provide more durable solutions for small cracks and connections. Pro tip: Always have extra materials on hand, as unexpected complications can arise during pipe repairs.
Finally, check your work area’s accessibility. Ensure you have proper lighting, a stable workspace, and room to maneuver. Position your tools within easy reach and clear the surrounding area to prevent accidents. A well-organized workspace contributes significantly to a successful and stress-free pipe repair experience.
The following table provides an overview of each key step in the leaking pipe repair process. This helps readers visualize the process, understand the general difficulty, and stay on track for a successful repair.
| Step | Description | Estimated Difficulty | Key Outcome |
|---|---|---|---|
| Identify the leak | Find and confirm the source and location of the leak | Moderate | Pinpoint leak for repair |
| Gather tools and materials | Assemble all required tools and replacement parts | Easy | Ready for safe repair |
| Turn off the water supply | Shut off main or local water valves | Easy | Prevent water damage |
| Repair the leaking pipe | Apply appropriate repair method for pipe type | Moderate to Hard | Restore pipe integrity |
| Test the repair | Gradually reintroduce water and check for leaks | Moderate | Ensure leak is fully sealed |
| Restore the water supply | Fully open water valves and check all fixtures | Easy | Confirm system is working |
Step 3: Turn Off the Water Supply
Turning off your home’s water supply is a critical safety step before attempting any pipe repairs. This action prevents additional water from flowing into the damaged area, minimizing potential water damage and creating a controlled environment for your repair work. Knowing how to quickly and effectively shut down your water supply can save you from costly flooding and complicated cleanup scenarios.
Locating your main water shutoff valve requires some preliminary investigation. Most residential homes have this valve situated in basements, crawl spaces, or near the perimeter of the house where the water service line enters. Look for a large valve with a wheel-like handle or a ball valve with a lever. In some homes, especially older constructions, the shutoff valve might be located near the water meter, often found in underground boxes near the street or on the property line.
Explore our comprehensive guide on shut-off valve management to understand the nuances of your home’s specific water control system. When you locate the main valve, turn it clockwise to shut off water completely. For wheel-handled valves, you might need to apply steady, firm pressure. Ball valves typically require a quarter turn to stop water flow. Important: Do not force the valve if it seems stuck or corroded, as this could cause additional damage.
If the main valve is difficult to access or appears damaged, you might need to use individual fixture shutoff valves located near sinks, toilets, or appliances. These smaller valves can provide localized water control and are often easier to manipulate. Check under sinks and behind toilets for these secondary shutoff options. Some newer homes feature color-coded valves or clear markings indicating their specific purpose.
After turning off the water, verify the shutdown by opening a few faucets throughout your home. Watch for water flow reduction or complete stoppage. Run both hot and cold water taps to confirm. If water continues flowing strongly, double-check your main valve and ensure it is fully closed. Drain remaining water from the pipes by keeping faucets open, which will help create a dry workspace for your upcoming repair.
For homeowners uncertain about their valve locations or uncomfortable performing this task, consulting a professional plumber is always a wise choice. Proper water supply management is crucial to preventing potential water damage and ensuring a safe, effective repair process.
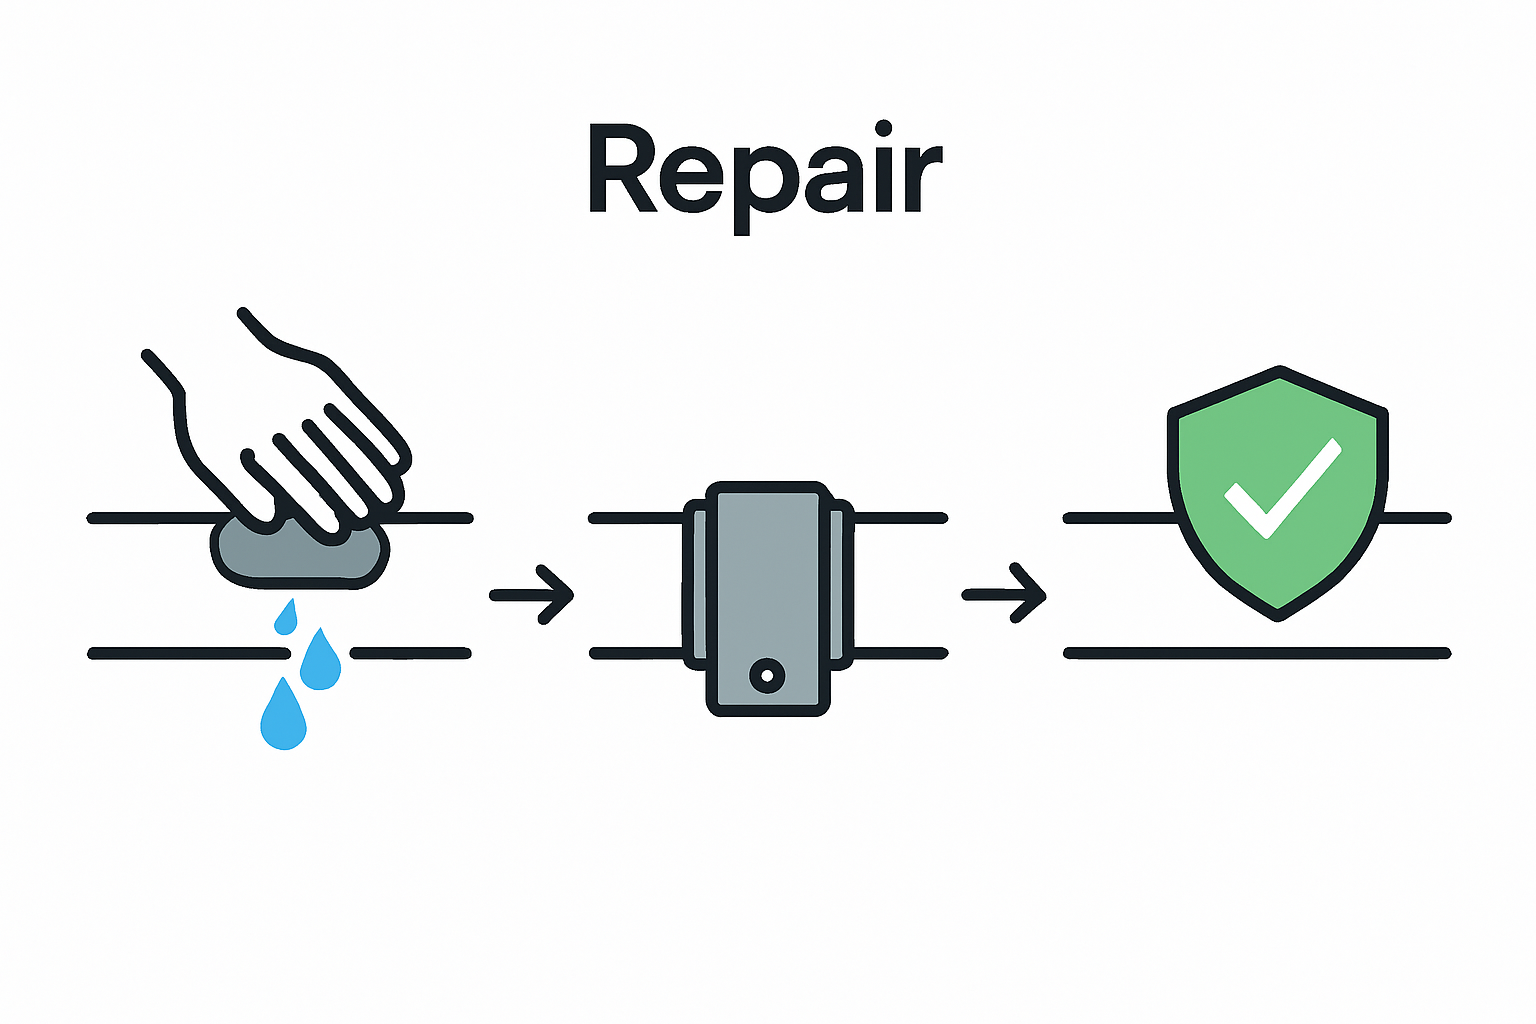
Step 4: Repair the Leaking Pipe
Repairing a leaking pipe requires precision, patience, and the right approach based on the specific type of damage. Different pipe materials and leak characteristics demand unique repair strategies. Your goal is to create a secure, watertight seal that will prevent future water damage and restore your plumbing system’s integrity.
For small punctures or hairline cracks, epoxy putty offers a quick and effective temporary solution. Knead the two-part compound thoroughly until it reaches a uniform color, then firmly press it directly over the damaged area. Work quickly, as most epoxy putty begins hardening within minutes. Smooth the edges to ensure a complete seal, and allow sufficient curing time as specified by the manufacturer’s instructions.
Learn more about advanced pipe repair techniques to understand the nuanced approaches for different pipe materials. For more significant damage, you might need to replace the entire pipe section. Begin by carefully cutting out the damaged portion using a pipe cutter, ensuring a clean, straight cut. Measure and purchase a replacement section that matches your existing pipe’s material and diameter precisely.
If you are working with copper pipes, soldering becomes necessary to create a permanent connection. Clean both the existing pipe and the replacement section thoroughly using emery cloth to remove oxidation. Apply soldering flux to the connection points, then use a propane torch to heat the joint evenly. Introduce solder wire, which will melt and flow into the connection, creating a watertight seal. Caution: This technique requires practice and proper safety equipment.
For PVC pipes, specialized PVC cement provides a strong, permanent bond. First, use PVC primer to prepare the pipe surfaces, then apply cement generously to both the pipe and fitting. Quickly connect the pieces, giving a quarter turn to distribute the cement evenly. Hold the connection steady for several seconds to ensure proper adhesion.
After completing the repair, wrap the repaired section with waterproof pipe tape for additional protection. This extra layer provides reinforcement and helps prevent potential future leaks. Once the repair is complete, slowly restore water flow, checking carefully for any signs of continued leakage. Remember: If the repair seems complex or you feel uncertain, consulting a professional plumber is always the safest approach.
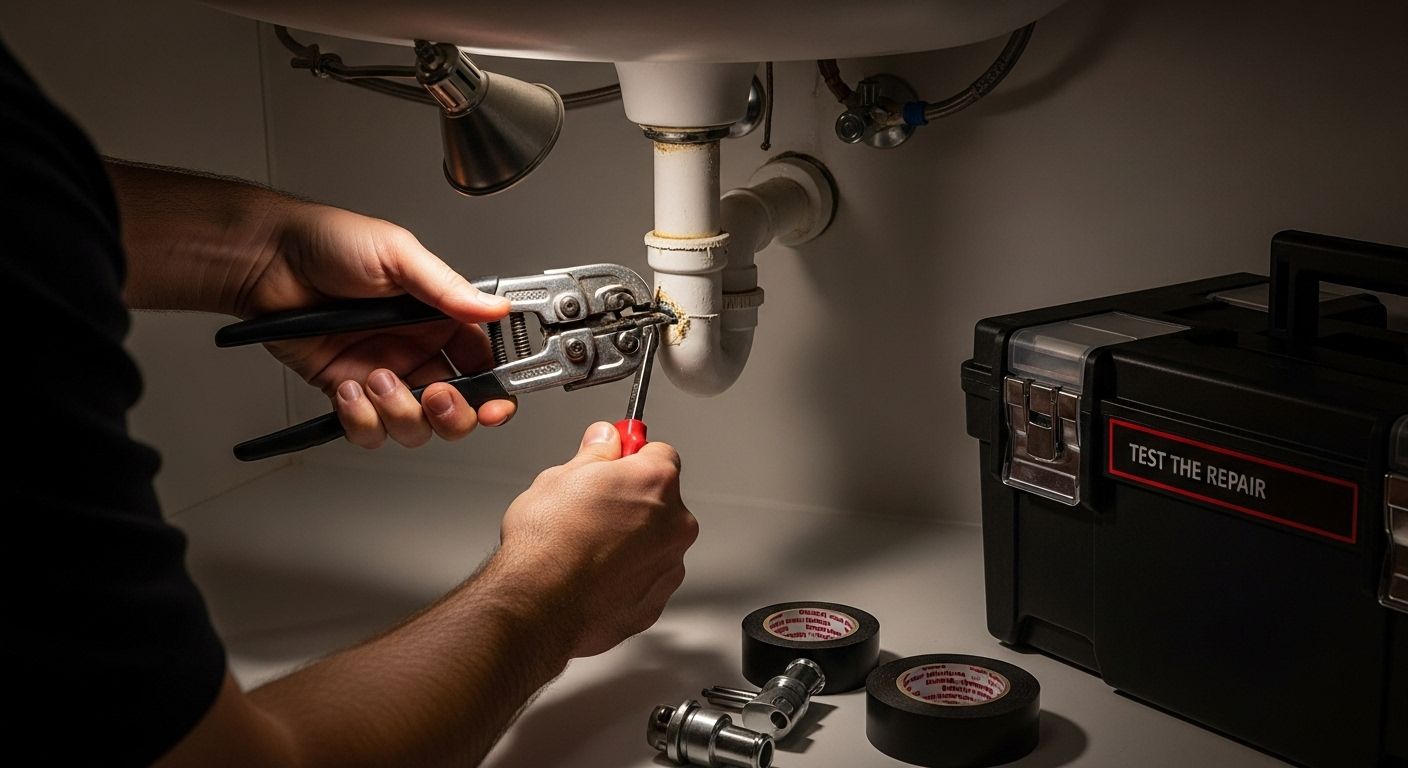
Step 5: Test the Repair
Testing your pipe repair is a critical final step that determines the success of your maintenance work. This phase involves carefully reintroducing water to your plumbing system and meticulously observing the repaired section for any signs of continued leakage or potential issues. A thorough testing process can save you from future water damage and costly additional repairs.
Gradually restore water flow by slowly turning the main water valve counterclockwise. This controlled approach allows you to monitor pressure and watch for immediate signs of trouble. Start with a quarter turn, listening carefully for any unusual sounds or observing any unexpected water movement. Discover more about comprehensive pipe repair techniques to enhance your understanding of potential complications.
Once water begins flowing, inspect the repaired pipe section closely. Look for three key indicators: any water seepage around the repair site, unusual moisture patterns, or unexpected dripping. Use a dry cloth or paper towel to check for wetness, running it along the entire repaired section and surrounding areas. Even a small amount of moisture could indicate an incomplete or ineffective repair.
Pay particular attention to the connection points and seams of your repair. These areas are most likely to reveal subtle leaks that might not be immediately apparent. Pro tip: Use a flashlight to improve visibility, especially in dimly lit areas like under sinks or in crawl spaces. Move the light slowly across the repaired section, looking for any glinting or reflection that might suggest water presence.
If possible, simulate different water pressures by running various fixtures in your home. Turn on faucets, flush toilets, and operate appliances that use water. This comprehensive test helps ensure your repair can withstand normal household water usage. Watch for any changes in water pressure or unexpected sounds that might indicate ongoing issues.
Should you notice any continued leakage or suspect the repair is not holding, do not hesitate to stop water flow and reassess. Some repairs require multiple attempts or professional intervention. Remember: A successful repair means completely dry pipes with no signs of water escape. If uncertainty persists, consulting a professional plumber is always the most prudent course of action to prevent potential water damage and ensure long-term plumbing system integrity.
Step 6: Restore the Water Supply
Restoring your home’s water supply marks the final phase of your pipe repair process. This critical step requires careful attention to detail and a methodical approach to ensure your repair holds up under normal water pressure and usage conditions. Your goal is to reintroduce water flow smoothly and safely, verifying the integrity of your repair work.
Begin by double-checking all connections and repair sites before turning the main water valve. Confirm that tools are removed, work areas are clear, and the repaired pipe section appears clean and properly sealed. Learn more about managing emergency plumbing repairs to understand potential complications during water restoration.
Slowly turn the main water valve counterclockwise, opening it incrementally. This gradual approach prevents sudden pressure surges that could potentially compromise your repair. Listen carefully for any unusual sounds like hissing, rushing water, or unexpected gurgling. Watch the repaired pipe section closely for any signs of immediate water seepage or moisture formation.
Once water begins flowing, systematically check all connected fixtures and faucets. Turn on cold and hot water taps throughout your home, observing water pressure and flow consistency. Pay special attention to the repaired pipe area, using a dry cloth to verify there are no subtle moisture signs. Pro tip: Keep a bucket or towels nearby during this process to quickly manage any unexpected water release.
If you notice any persistent dripping, moisture, or unusual water behavior, immediately shut off the main water valve and reassess your repair. Some leaks might only become apparent under sustained water pressure, so patience and careful observation are key. Minor adjustments or reapplication of sealant might be necessary to achieve a completely watertight result.
Finally, clean your work area thoroughly, removing any debris, excess materials, or tools. Document the repair process with photographs, noting the date and specific pipe section addressed. This documentation can be valuable for future reference or if you need to consult a professional plumber. Remember: While DIY repairs can be successful, do not hesitate to contact a professional if you have any doubts about the repair’s effectiveness or long-term reliability.
Don’t Let a Leaking Pipe Ruin Your Day—Get Reliable Professional Help in Ottawa
You followed every step in our guide, from spotting water stains behind your walls to wrapping your tools for that perfect patch. But sometimes, hidden pipe leaks or stubborn fittings can be overwhelming. Dealing with unexpected water damage and the stress of emergency repairs can leave anyone uncertain about next steps. If your DIY efforts were not enough or if you want complete peace of mind, Delta Plumbers is here to help Ottawa homeowners and businesses with fast, affordable, and professional plumbing solutions. See our full range of services in the Uncategorized Archives to discover solutions tailored for every plumbing challenge you might face.

Choose a team that guarantees same-day repairs, transparent flat-rate pricing, and a one-year warranty so you never have to second-guess your repair. Book your professional plumbing service right now at Delta Plumbers and restore safety, comfort, and reliability to your home or business within hours. Get your pipes fixed before a small leak becomes a big problem. Your expert solution is just a click away.
Frequently Asked Questions
How can I identify the source of a leaking pipe?
Start by visually inspecting areas around pipes for moisture signs, such as water stains, discoloration, and soft spots. Conduct a water meter test by turning off all water sources; if the meter still registers usage, there’s likely an active leak.
What tools do I need to repair a leaking pipe?
Essential tools include adjustable pipe wrenches, plumber’s tape, a variety of screwdrivers, needle-nose pliers, and a high-quality pipe cutter. Depending on the repair, you may also need replacement pipe sections, soldering equipment for copper pipes, or specialized repair clamps.
How should I turn off the water supply before a repair?
Locate your main water shutoff valve, typically found in basements or near the water meter. Turn the valve clockwise to shut off water completely. Confirm the shutdown by opening a few faucets to ensure no water flow continues.
What types of repairs can I use for different pipe materials?
For small leaks in PVC pipes, use PVC cement for a strong bond. For copper pipes, soldering is often required. Epoxy putty serves as a temporary fix for small cracks. Always ensure the replacement parts match the existing pipes’ material and size.