
Swapping out a faucet seems like a quick fix for your Ottawa kitchen or bathroom. Some models promise top-notch water savings with WaterSense-certified faucets cutting usage to as low as 1.5 gallons per minute. Most people think choosing a faucet is just about picking a nice finish and grabbing a wrench. Yet, the surprising part is that a single mistake—like missing a leak or the wrong valve—can end up costing more than the faucet itself.
Table of Contents
- Choosing The Right Faucet For Your Property
- Preparing Your Space And Gathering Tools
- Step-By-Step Faucet Installation Process
- Troubleshooting Common Faucet Installation Issues
Quick Summary
| Takeaway | Explanation |
|---|---|
| Choose Water-Efficient Faucets | Select faucets that meet EPA WaterSense criteria to conserve water and reduce bills effectively. |
| Consider Professional Installation | Hiring a plumber can prevent costly mistakes and ensure proper fitting during the installation process. |
| Prepare Your Workspace Thoroughly | Clear the area under your sink and gather tools beforehand to facilitate a smoother installation experience. |
| Test for Leaks Post-Installation | After connecting everything, turn on the water and inspect for leaks at all joints to avoid future water damage. |
| Use Quality Materials for Durability | Opt for brass or stainless steel faucets for better longevity and maintenance, ensuring your investment lasts longer. |
Choosing the Right Faucet for Your Property
Selecting the right faucet for your property involves more than just picking a design that matches your aesthetic preferences. The wrong choice can lead to water inefficiency, potential health risks, and unexpected maintenance costs. Understanding the critical factors that influence your faucet selection will help you make an informed decision that balances functionality, safety, and long-term value.
Water Efficiency and Safety Considerations
When choosing a faucet, water efficiency should be at the forefront of your decision-making process. According to the U.S. Department of Energy, WaterSense-labeled faucets provide an excellent benchmark for performance and conservation. These faucets are designed to meet strict EPA criteria, with recommended flow rates of 0.5 gallons per minute for public restrooms and up to 1.5 gallons per minute for residential spaces.
Moreover, health considerations are paramount. The U.S. Consumer Product Safety Commission warns about potential lead contamination in some faucets. Homeowners should prioritize faucets certified to NSF/ANSI 61 and labeled ‘NSF/ANSI 372’ to ensure they are completely lead-free. This certification guarantees that the faucet meets stringent safety standards for drinking water components.
Material and Design Selection
The material of your faucet significantly impacts its durability, performance, and maintenance requirements. Brass and stainless steel remain top choices for residential and commercial properties due to their corrosion resistance and longevity. Ceramic disc valves offer superior performance compared to traditional compression valves, providing smoother operation and reduced likelihood of leaks.
Consider the mounting configuration carefully. Single-hole faucets work well in compact spaces, while widespread models offer more flexibility in larger sinks. For those looking to upgrade their kitchen plumbing, our experts recommend evaluating your sink’s existing holes and configuration before making a final selection.
Beyond technical specifications, the finish plays a crucial role in both aesthetics and functionality. Brushed nickel and chrome finishes not only provide a contemporary look but also resist fingerprints and water spots. Some homeowners might prefer matte black or bronze finishes for a more distinctive appearance, but these may require more meticulous maintenance.
Here’s a comparison table to help you choose the best faucet material and valve type for your needs, as discussed above.
| Material / Valve Type | Durability | Maintenance Needs | Key Benefits |
|---|---|---|---|
| Brass | High | Low | Corrosion-resistant, long-lasting |
| Stainless Steel | High | Low | Rust-proof, durable, modern appearance |
| Ceramic Disc Valve | Very High | Very Low | Smooth operation, minimizes leaks |
| Compression Valve | Moderate | Moderate | Low cost, older style, more prone to leaks |
| Brushed Nickel Finish | High | Low | Resists fingerprints and water spots |
| Chrome Finish | High | Low | Easy to clean, classic, resists smudges |
| Matte Black / Bronze | High (if high quality) | Moderate to High | Unique look, may require extra care |
While DIY installation might seem appealing, professional guidance can prevent costly mistakes. An improperly installed faucet can lead to water damage, inefficient water flow, and potential long-term plumbing issues. Professional plumbers can ensure precise installation, proper sealing, and optimal performance from your chosen fixture.
Ultimately, selecting the right faucet is an investment in your property’s functionality and value. By considering water efficiency, safety certifications, material quality, and professional installation, you can choose a faucet that meets your practical needs while enhancing your space’s overall aesthetic appeal.
Preparing Your Space and Gathering Tools
Preparing your workspace correctly is a critical first step in successfully installing a new faucet. Proper preparation not only ensures a smoother installation process but also minimizes potential damage to your plumbing and surrounding areas. A well-organized approach can save you time, reduce frustration, and help you achieve professional-quality results.
Essential Tools and Materials
Before beginning your faucet installation, gathering the right tools is paramount. According to the U.S. Department of Housing and Urban Development, a comprehensive toolkit for plumbing fixture installation should include several key items. Basic tool requirements include:
- Adjustable wrench: For tightening and loosening nuts and connections
- Basin wrench: Specifically designed for hard-to-reach sink connections
- Plumber’s putty: Creates watertight seals around fixture bases
- Bucket: Catches water and prevents potential floor damage
- Towels or rags: For cleaning and managing potential water spillage
- Penetrating lubricant: Helps loosen stubborn old fixtures
- Flashlight: Provides better visibility in tight under-sink spaces
Additionally, consider having silicone tape, Teflon tape, and a hacksaw on hand for potential modifications or unexpected challenges during installation.
Consult this table for a handy checklist of the essential tools and materials you’ll need when preparing for a faucet installation in Ottawa.
| Tool / Material | Purpose | Have it Ready? |
|---|---|---|
| Adjustable wrench | Tightening/loosening nuts/connectors | |
| Basin wrench | Hard-to-reach under-sink connections | |
| Plumber’s putty | Creates watertight seals | |
| Bucket | Catches water/prevents floor damage | |
| Towels or rags | Cleaning/water spillage management | |
| Penetrating lubricant | Loosen old or stuck fixtures | |
| Flashlight | Visibility in tight spaces | |
| Silicone or Teflon tape | Seal threaded connections | |
| Hacksaw | For unexpected pipe modifications |
Workspace Preparation and Safety Considerations
Preparing your workspace involves more than just collecting tools. Proper preparation minimizes risks and ensures a clean, efficient installation process. Begin by clearing the area underneath your sink completely. Remove cleaning supplies, stored items, and any obstacles that might impede your movement or access to plumbing connections.
Critical safety steps include shutting off water supply valves to prevent unexpected water flow. Locate the shut-off valves beneath the sink and turn them clockwise until fully closed. If your sink lacks dedicated shut-off valves, you may need to shut off the main water supply to your home. Professional plumbers recommend testing the water supply by turning on the faucet after shutting off valves to confirm complete water cessation.
Protect your workspace by laying down old towels or a waterproof drop cloth to catch potential water drips and prevent damage to cabinets or flooring. Ensure adequate lighting and have a clear path to dispose of old parts and bring in new components. If you’re working in a tight space, consider using a low stool or portable work light to improve visibility and comfort.
Before disconnecting any existing plumbing, take photographs of the current configuration. These images serve as valuable references during reinstallation and can help you track the original setup if you encounter challenges. Additionally, organize your new faucet components and installation instructions in a clean, accessible area to streamline the process.
While many homeowners attempt DIY faucet installations, recognizing your skill level is crucial. Complex installations involving older plumbing, unusual sink configurations, or significant modifications might require professional intervention. Delta Plumbers offer expert installation services that guarantee proper fitting and prevent potential water damage.
By investing time in thorough preparation, you set the stage for a successful faucet installation. Proper tools, a well-organized workspace, and a methodical approach can transform what might seem like a daunting task into a manageable home improvement project.
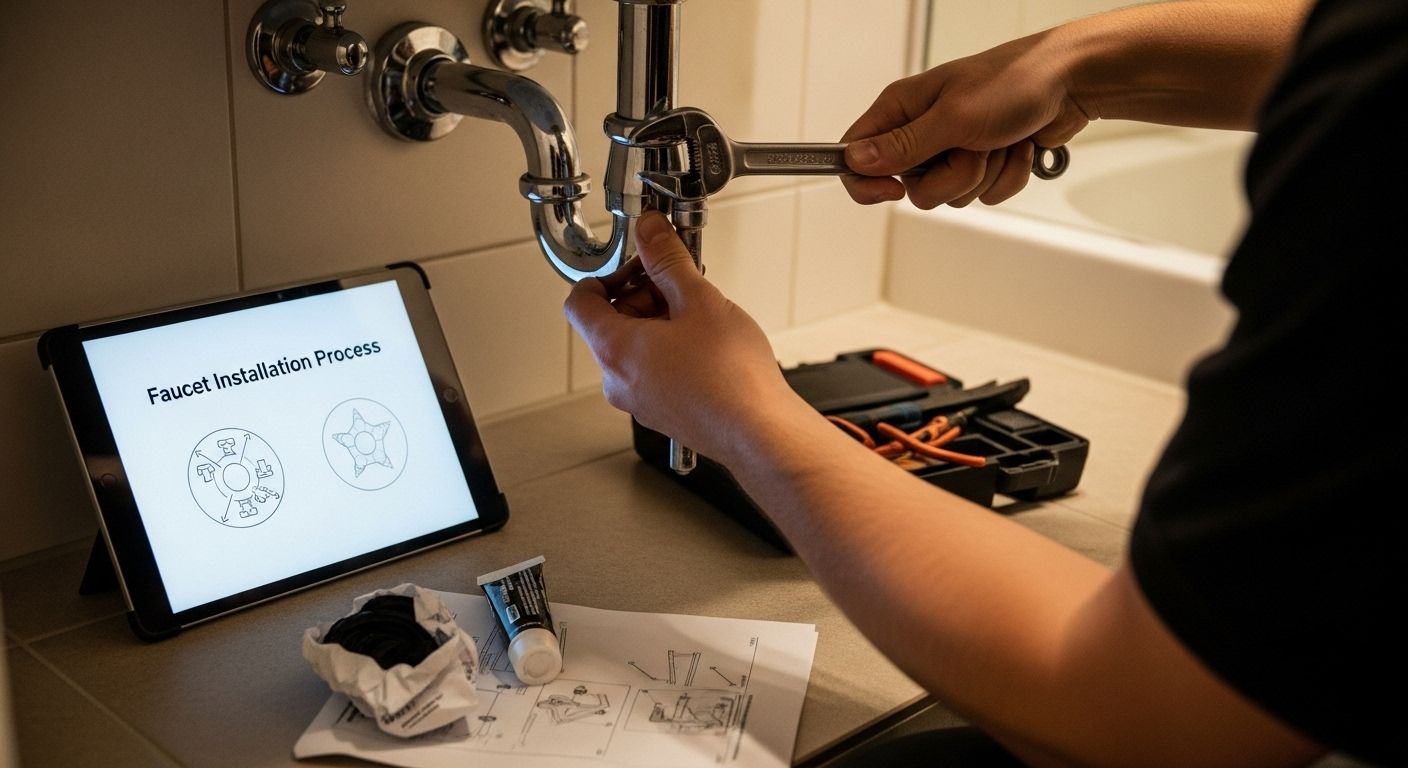
Step-by-Step Faucet Installation Process
Installing a new faucet requires precision, patience, and a systematic approach. While many homeowners feel intimidated by this task, breaking down the process into clear, manageable steps can transform a potentially complex project into an achievable home improvement goal. According to Family Handyman, a successful faucet installation hinges on careful preparation and methodical execution.
Removing the Old Faucet
Begin by completely disconnecting the existing faucet. Start underneath the sink by detaching supply lines using an adjustable wrench. Be prepared with a bucket and towels to catch any residual water. Carefully remove mounting nuts that secure the old faucet to the sink surface, working slowly to prevent damage to the sink or surrounding area.
If the existing hardware seems stuck, apply a penetrating lubricant and allow it to sit for 10-15 minutes before attempting removal. Take photographs of the current configuration to serve as a reference during the new installation. Clean the sink surface thoroughly, removing any old plumber’s putty or mineral deposits that might interfere with the new faucet’s seal.
Installing the New Faucet Components
Prepare the new faucet by carefully reviewing the manufacturer’s instructions. Our professional installation guide recommends dry-fitting all components before applying any sealants or making permanent connections. Apply a thin, consistent bead of plumber’s putty around the base of the faucet to ensure a watertight seal.
Carefully thread the faucet through the mounting holes, ensuring it sits level and aligned correctly. From underneath the sink, secure the mounting hardware, tightening nuts evenly to prevent misalignment. Use a basin wrench for hard-to-reach connections, which provides better leverage in tight spaces.
Final Connection and Testing
Connect the water supply lines carefully, wrapping threads with Teflon tape to prevent potential leaks. Hand-tighten connections initially, then use a wrench to make a final quarter-turn. Avoid over-tightening, which can damage threading or cause future leaks.
Once all connections are secure, slowly turn on the water supply valves. Check for leaks by running water and examining all connection points. Pay close attention to the base of the faucet and underneath the sink. If you notice any persistent drips or unusual water flow, our professional plumbers recommend immediate inspection to prevent potential water damage.
Additionally, run both hot and cold water to ensure smooth operation and check that the faucet moves smoothly if it includes a pull-down or pull-out spray head. Test all functions thoroughly before considering the installation complete.
Review this step-by-step installation table to help keep your faucet installation organized and on track.
| Step | Action/Description | Key Tips |
|---|---|---|
| 1. Remove Old Faucet | Disconnect supply lines, remove mounting nuts, clean sink area | Use bucket & towels; apply penetration oil |
| 2. Prep New Faucet | Review instructions; dry-fit components; apply plumber’s putty | Photograph old setup for reference |
| 3. Mount and Align New Faucet | Insert faucet, align, secure mounting hardware from underneath | Use basin wrench where needed |
| 4. Connect Water Supply Lines | Wrap threads with Teflon tape, connect lines, hand tighten then quarter-turn with wrench | Avoid over-tightening |
| 5. Test and Inspect | Turn on valves, inspect for leaks, test all functions | Run hot and cold water, check for drips |
While many homeowners successfully complete faucet installations, it’s crucial to recognize when professional help might be necessary. Complex installations involving older plumbing, unusual sink configurations, or significant modifications can quickly become challenging for inexperienced DIY enthusiasts.
By following these systematic steps and maintaining patience throughout the process, you can achieve a professional-quality faucet installation that enhances both the functionality and appearance of your kitchen or bathroom sink.
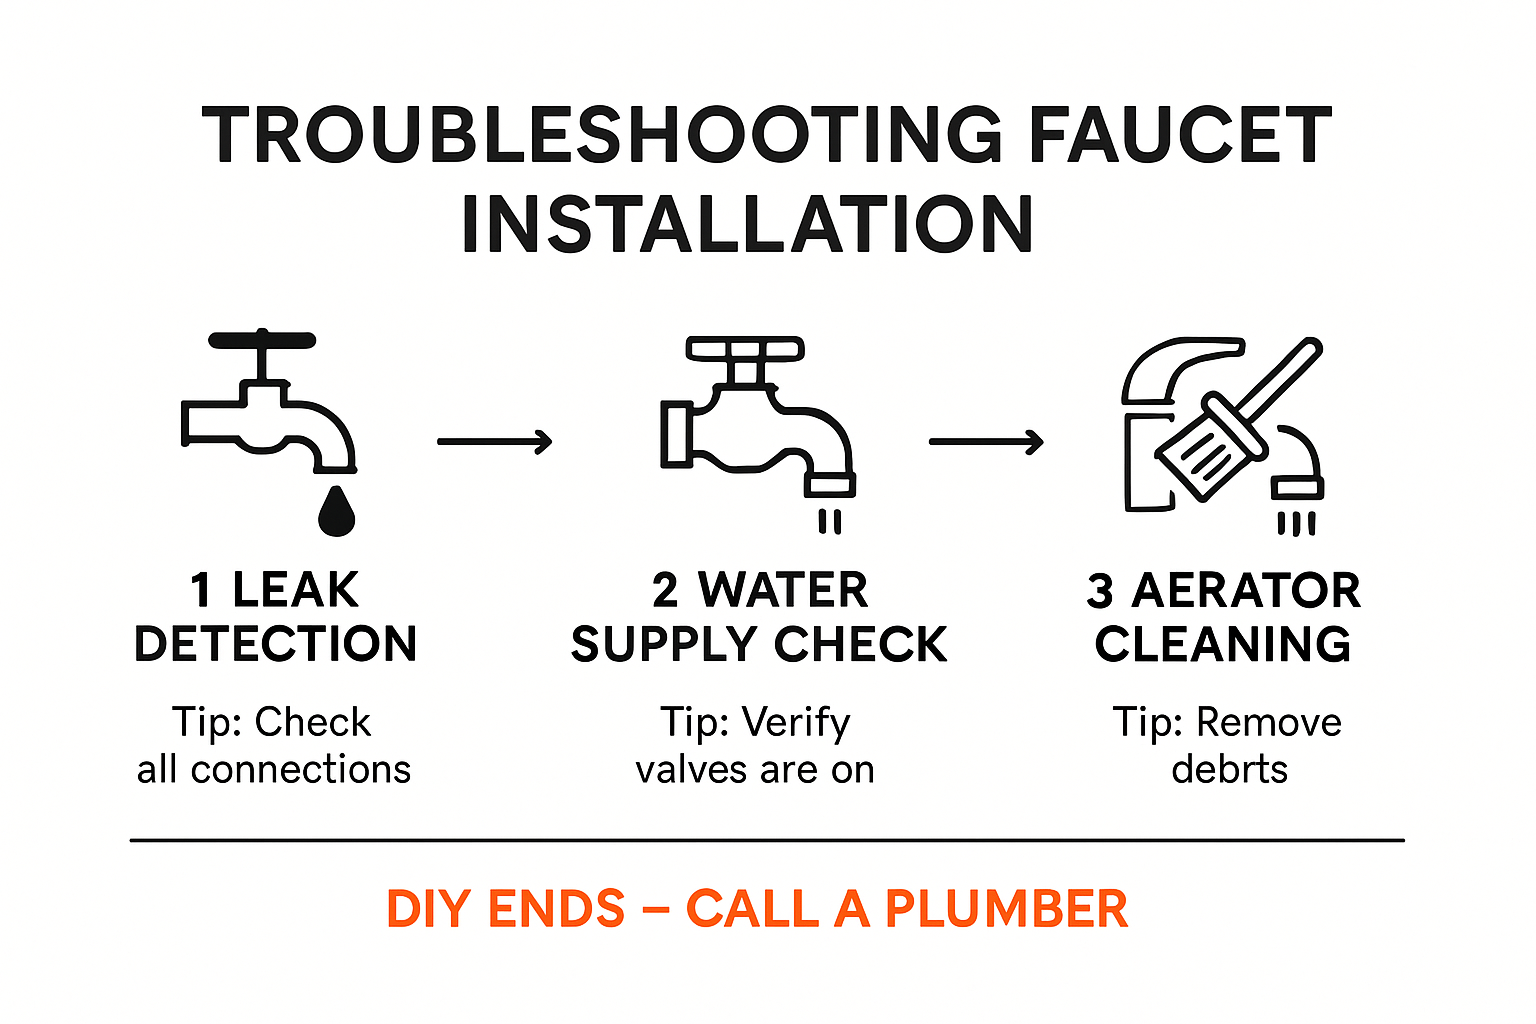
Troubleshooting Common Faucet Installation Issues
Even with meticulous preparation, faucet installations can present unexpected challenges that frustrate even experienced DIY enthusiasts. Understanding how to identify and resolve common issues can save significant time, prevent water damage, and ensure a functional plumbing fixture.
Identifying and Resolving Leak Sources
Leaks represent the most frequent complication during and after faucet installation. Not all leaks are immediately apparent, and their origins can vary significantly. Our expert troubleshooting guide recommends a systematic approach to leak detection.
Connection point leaks typically occur due to improper threading, insufficient Teflon tape, or over-tightening of supply lines. Carefully inspect all connection points, looking for water droplets or moisture. If a leak appears at the base connection, reapply plumber’s putty and ensure the faucet sits level. Leaks underneath the sink might indicate loose mounting nuts or damaged supply line washers.
Pay special attention to connections between supply lines, shut-off valves, and the faucet itself. A quarter-turn wrench can help achieve the perfect tension without causing damage. Remember that hand-tight followed by a slight quarter-turn is usually sufficient to create a watertight seal.
Water Pressure and Flow Complications
Inconsistent water pressure or reduced flow can indicate installation errors or underlying plumbing issues. Begin by checking that all supply valves are fully open and that no kinks exist in the flexible supply lines. Aerator blockages can also cause reduced water flow, so remove and clean the aerator thoroughly during installation.
If water pressure remains problematic, inspect the cartridge and valve mechanism. Improper alignment or debris can prevent smooth operation. Manufacturers often include specific alignment instructions that are crucial for maintaining optimal water flow. Professional installation services can provide precision alignment and pressure testing to ensure complete functionality.
Mechanical and Alignment Challenges
Misalignment during installation can lead to significant operational issues. A faucet that sits unevenly or doesn’t move smoothly indicates potential mounting problems. Ensure mounting holes are clean and free from old sealant or debris before installing the new fixture. Use a level to confirm the faucet sits perfectly straight both horizontally and vertically.
For pull-down or pull-out faucets, test the spray head’s retraction mechanism carefully. Stiff movement or failure to return smoothly often results from improper weight distribution or incorrect hose routing. Verify that the counterweight is correctly positioned and the hose has a natural, unobstructed path.
Some installation challenges extend beyond immediate mechanical issues. Older sinks with non-standard configurations or signs of corrosion might require professional assessment. Hidden plumbing complications can transform what seems like a simple installation into a complex repair project.
While many homeowners successfully troubleshoot minor installation issues, recognizing your technical limitations is crucial. Persistent problems, unexplained leaks, or complex mechanical challenges warrant professional intervention. A small investment in expert assistance can prevent costly water damage and ensure long-term plumbing system integrity.
By approaching faucet installation with patience, systematic problem-solving, and a willingness to seek professional help when needed, you can successfully navigate most installation challenges and enjoy a fully functional, leak-free plumbing fixture.
Frequently Asked Questions
How do I choose the right faucet for my home?
When selecting a faucet, consider factors like water efficiency (look for WaterSense-certified options), material durability (brass and stainless steel are top choices), design compatibility with your space, and safety certifications to ensure lead-free construction.
What tools do I need to install a faucet?
Essential tools for faucet installation include an adjustable wrench, basin wrench, plumber’s putty, bucket, towels, penetrating lubricant, and a flashlight. Having silicone tape and a hacksaw on hand can also be beneficial for unexpected challenges.
What are the most common mistakes during faucet installation?
Common mistakes include not thoroughly cleaning the sink surface, failing to apply plumber’s putty correctly, over-tightening connections, and not testing for leaks after installation. Taking your time and following a detailed guide can help prevent these issues.
How can I troubleshoot leaks after installing a faucet?
To troubleshoot leaks, inspect all connection points for tightness, ensure that Teflon tape is used where necessary, and check if the faucet base is level. If leaks persist, you may need to reapply plumber’s putty and check the supply line washers or mounting nuts for security.
Ready to Skip the Stress of Faucet Installation?
Swapping out a faucet can go from simple to stressful in Ottawa homes, especially when you deal with stubborn leaks, confusing valves, or hard-to-reach fittings. The article above highlights exactly how small mistakes during DIY projects can cause costly water damage and drain your time. Want peace of mind knowing your installation will be leak-free, efficient, and done right the first time? Let trusted professionals handle it while you focus on what matters most at home.

Make a smart move today. For reliable, same-day service and experienced plumbers you can count on, reach out to Delta Plumbers Ottawa. Our experts handle everything from tricky faucet installations to urgent leaky faucet repairs, all backed by a one-year warranty and transparent flat-rate pricing. Contact us now and take the guesswork out of your next plumbing upgrade.